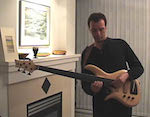
Hi guys,
I just wanted to share a little project that I am just in the process of completing. I'm 98% there now.
I spotted this '97 Warwick Streamer Stage 1 using the Search All Craiglists web site in Dallas. It had a broken headstck snapped just above the nut. It looked like a clean break so I did a little digging and research on the web and found that it should be 100% repairable. See the pics of the broken headstock. A little blurry but you get the idea. I bought it sight unseen just from the photos. It was pretty good deal.
Warwick Streamer Stage 1 headstock repair and clean up
Moderator: Rodent
Warwick Streamer Stage 1 headstock repair and clean up
- Attachments
-
- Snap 1
- Snap 1.jpg (111.23 KiB) Viewed 18397 times
-
- The back showing some nice flame maple action and the honey violin color.
- IMG_0739.JPG (82.38 KiB) Viewed 18398 times
-
- The whole bass in the case.
- IMG_0741.JPG (123.18 KiB) Viewed 18399 times
Re: Warwick Streamer Stage 1 headstock repair and clean up
One more pic of the break.
- Attachments
-
- Snap 2.jpg (117.28 KiB) Viewed 18396 times
Re: Warwick Streamer Stage 1 headstock repair and clean up
When I received the bass I found that it was exactly as pictured although the hardware was in much worse shape than I thought. The frets needed dressing, the bridge was missing a saddle and was pitted, and it was generally dirty. I gave her a good cleanup, dressed the frets with 600 grit wet/dry paper and fine bronze wool. I ordered a new bridge, new Just a Nut III, some pickup mounting screws, and straplocks from Warwick in Germany. The new bridge is on (looks great) and I'm waiting for some missing height adjustment screws for the Just a Nut III before I tackle that upgrade.
After doing a BUNCH of reading online I found that, since it was a clean break there were a number of acceptable gluing methods I could use: West System Marine Epoxy; Titebond; Hide Glue; Gorilla Glue;, etc.
I chose West System because that's what I had here on the boat. I found an article online on the ASIA (Association of Stringed Instrument Artisans) web site on the steps needed. I bought some clamps, fabricated some cauls out of marine grade plywood and cork that I used to protect the wood of the bass, put some wax on the headstock every where that I didn't want epoxy to stick and, after gluing the heck out of it, I put some wax paper in between my cauls and the headstock for further protection from stickiness.
After a couple of days of curing I took the clamps off and started the cleanup process, it wasn't too bad because of the protection I had used for the headstock. I put the tuners back on, strung it up, and started the laborious process of getting the neck, action, and intonation tweaked. I used Jerzy Drozd's Ultimate Setup Guide for Bass that you can get for free from his web site, as a guide.
After a couple of hours of mucking about I got it to a playable state and was most impressed.
This is a great little bass!
Now I just need to do the nut and put on some new knobs, these old ones are a little tired. I'm also expecting to tweak the neck some more after it's had a chance to settle back in. It apparently was without string tension for more than 2 years after the initial break.
After doing a BUNCH of reading online I found that, since it was a clean break there were a number of acceptable gluing methods I could use: West System Marine Epoxy; Titebond; Hide Glue; Gorilla Glue;, etc.
I chose West System because that's what I had here on the boat. I found an article online on the ASIA (Association of Stringed Instrument Artisans) web site on the steps needed. I bought some clamps, fabricated some cauls out of marine grade plywood and cork that I used to protect the wood of the bass, put some wax on the headstock every where that I didn't want epoxy to stick and, after gluing the heck out of it, I put some wax paper in between my cauls and the headstock for further protection from stickiness.
After a couple of days of curing I took the clamps off and started the cleanup process, it wasn't too bad because of the protection I had used for the headstock. I put the tuners back on, strung it up, and started the laborious process of getting the neck, action, and intonation tweaked. I used Jerzy Drozd's Ultimate Setup Guide for Bass that you can get for free from his web site, as a guide.
After a couple of hours of mucking about I got it to a playable state and was most impressed.
This is a great little bass!
Now I just need to do the nut and put on some new knobs, these old ones are a little tired. I'm also expecting to tweak the neck some more after it's had a chance to settle back in. It apparently was without string tension for more than 2 years after the initial break.
- Attachments
-
- Back 1
- DSC_0003.jpg (28.23 KiB) Viewed 18397 times
-
- Headstock face
- DSC_0002.jpg (36.01 KiB) Viewed 18396 times
-
- the full monty
- DSC_0001.jpg (48.76 KiB) Viewed 18399 times
Re: Warwick Streamer Stage 1 headstock repair and clean up
As you can see from the back of the headstock, you can see where the break was. As this is an oil finish I attempted to clean it up a little around the break by wet sanding with Tung oil, unfortunately it seeped into the crack just a hair and darkened it. Not the end of the world I suppose.
Any comments would be welcomed. First time I've done this kind of repair and so far, knock on flamed maple, it seems to be holding.
Gonna have to wait for the new knobs as they're kinda of pricey. A new set of knobs for this bass with the inlaid bass clef from Warwick will cost almost as much as I paid for the bass.
Any comments would be welcomed. First time I've done this kind of repair and so far, knock on flamed maple, it seems to be holding.
Gonna have to wait for the new knobs as they're kinda of pricey. A new set of knobs for this bass with the inlaid bass clef from Warwick will cost almost as much as I paid for the bass.
- Attachments
-
- Nice new bridge, really makes those knobs look crappy.
- DSC_0006.jpg (47.81 KiB) Viewed 18395 times
-
- back 3
- DSC_0005.jpg (28.06 KiB) Viewed 18393 times
-
- back 2
- DSC_0004.jpg (32.19 KiB) Viewed 18395 times
Re: Warwick Streamer Stage 1 headstock repair and clean up
By the way, those early pics of the bass with the busted headstock are in somebody else's shop. I don't have a shop, I did this repair in the wheelhouse of the boat I run. 

Re: Warwick Streamer Stage 1 headstock repair and clean up
That is frikkin' AWESOME!!!
You know, I would probably NEVER take a risk buying a bass like that, but man... it really turned out for you.
The bass is BEAUTIFUL, and the neck/headstock is probably stronger now than it was before.
Very cool project, and I think it looks great... congrats!
You know, I would probably NEVER take a risk buying a bass like that, but man... it really turned out for you.
The bass is BEAUTIFUL, and the neck/headstock is probably stronger now than it was before.
Very cool project, and I think it looks great... congrats!
F Bass BN5 • ZON Legacy Elite 5 • ZON Sonus Elite 5 Fretless • ZON Sonus BG5 • Fender Custom Shop '64 NOS Jazz • Fender Custom Shop '75 NOS Jazz • Fender ADE Precision • Music Man SR4
Re: Warwick Streamer Stage 1 headstock repair and clean up
Hey Addison,
Thanks much for the comments!
I have ta tell ya, I was pretty nervous about the deal because the pics were 2 years old... but I talked to the girl that owned it on the phone a few times, I saw a pic of her playing the bass on stage years ago, so it seemed legit. Plus, the wood on the bass is SOOOO nice I had a gut feeling it would work out. i do like a nice Flame Maple.
I also communicated with Hans Peter Wilfer himself and he confirmed the serial number and build record from '97.
By the way, after seeing so many comments about baseball bat Warwick necks, the neck on this beastie is pretty nice. It's just a shade over jazz bass width at the nut and plays real smooth. Also, the intonation on this thing is awesome. Very in tune all the way to the 24th fret. Although it could be because I'm used to 5'ers.
Thanks much for the comments!
I have ta tell ya, I was pretty nervous about the deal because the pics were 2 years old... but I talked to the girl that owned it on the phone a few times, I saw a pic of her playing the bass on stage years ago, so it seemed legit. Plus, the wood on the bass is SOOOO nice I had a gut feeling it would work out. i do like a nice Flame Maple.
I also communicated with Hans Peter Wilfer himself and he confirmed the serial number and build record from '97.
By the way, after seeing so many comments about baseball bat Warwick necks, the neck on this beastie is pretty nice. It's just a shade over jazz bass width at the nut and plays real smooth. Also, the intonation on this thing is awesome. Very in tune all the way to the 24th fret. Although it could be because I'm used to 5'ers.
- Attachments
-
- These are the knobs I'm thinking of getting, in gold of course
- Bass Clef Knobs.jpg (50.4 KiB) Viewed 18376 times
-
fivebass52
- Posts: 3628
- Joined: November 26th, 2008, 6:14 am
- Location: Oahu, Hawaii
- Contact:
Re: Warwick Streamer Stage 1 headstock repair and clean up
Well done! Not usually a fan of Warwicks, but that shape is nice, and the wood is beautiful! Great score, and repair. By the way, who sells those knobs?
R&B Stretch Bass, Walter Woods 1000w Green-Light Stereo Amp, AccuGroove El Whappo and TR112, assorted axes, amps, cabs...
http://www.myspace.com/thestrangershawaii
http://www.myspace.com/thestrangershawaii
Re: Warwick Streamer Stage 1 headstock repair and clean up
The knobs are available from the Warwick shop. Along with a slew of other stuff.
http://shop.warwick.de/index.php?cat=c4 ... trols.html
http://shop.warwick.de/index.php?cat=c4 ... trols.html
-
leftybassman392

- Posts: 196
- Joined: June 17th, 2009, 8:13 am
- Location: Northampton, England
Re: Warwick Streamer Stage 1 headstock repair and clean up
Mark, that looks like an excellent job you've done on the repair. Personally I don't have a problem with it being slightly visible - adds to the character of the instrument IMHO. And that grain is just beautiful.
Andy K.
http://www.myspace.com/consortiumsessionplayers
1977 Jazz 4
'98 Thumb BO 5
'05 SEI Original Headless 5
'09 Regenerate Axiom 4
'90's Roscoe LG3000 fretless
PJB Amps
http://www.myspace.com/consortiumsessionplayers
1977 Jazz 4
'98 Thumb BO 5
'05 SEI Original Headless 5
'09 Regenerate Axiom 4
'90's Roscoe LG3000 fretless
PJB Amps

Re: Warwick Streamer Stage 1 headstock repair and clean up
my gosh, you are going to give Rodent a run for his money if you keep that up. Great job!
The extent of my luthier skills would have permitted me to take it to my local guy and say "Fix this please."
My other choice of repair would have involved Bazooka bubble-gum and a very large rubber band or two.
Congrats again on a job well done.
The extent of my luthier skills would have permitted me to take it to my local guy and say "Fix this please."
My other choice of repair would have involved Bazooka bubble-gum and a very large rubber band or two.
Congrats again on a job well done.

Re: Warwick Streamer Stage 1 headstock repair and clean up
just getting back in from a two week Seattle -> Amsterdam -> Paris -> Montreal -> Detroit -> Wichita -> Seattle business trip ... where's my coffee?!!!
EXCELLENT JOB Mark! Bummer on the tung oil seepage, but it's not terribly distracting IMO.
Do be careful - the lure of bass building/fixing is near impossible to resist once you open the door. Feel welcome to drop me a note if I can ever be of help in offering advice on a difficult task
all the best,
Rod
EXCELLENT JOB Mark! Bummer on the tung oil seepage, but it's not terribly distracting IMO.
Do be careful - the lure of bass building/fixing is near impossible to resist once you open the door. Feel welcome to drop me a note if I can ever be of help in offering advice on a difficult task
all the best,
Rod
Moderator: Blueprinting and Bondo
Pickups: Honey Badger Pickups - Like Honey Badger Pickups on Facebook!
Basses: Regenerate Guitar Works - Like Regenerate Guitar Works on Facebook!
Pickups: Honey Badger Pickups - Like Honey Badger Pickups on Facebook!
Basses: Regenerate Guitar Works - Like Regenerate Guitar Works on Facebook!
Re: Warwick Streamer Stage 1 headstock repair and clean up
Hey all,
Thanks for the kind words. Rod, you're right about the addiction. I'm noodling with a couple of ideas for another project already and shopping around for another deal. Altho, finding another one as good as this is probably a long shot. Especially in lefty.
I'm going to strip the bass down this weekend, put the new nut on and do a Tung Oil refresh of the finish with some fine wet/dry paper. 600 then 1200 grit, I'm thinking.
Then do the Warwick beeswax.
Any thoughts Rod?
Thanks for the kind words. Rod, you're right about the addiction. I'm noodling with a couple of ideas for another project already and shopping around for another deal. Altho, finding another one as good as this is probably a long shot. Especially in lefty.
I'm going to strip the bass down this weekend, put the new nut on and do a Tung Oil refresh of the finish with some fine wet/dry paper. 600 then 1200 grit, I'm thinking.
Then do the Warwick beeswax.
Any thoughts Rod?
Re: Warwick Streamer Stage 1 headstock repair and clean up
Hey Rod, did you stop at Schwartz's; the Brown Derby or Chenoy's (all fine deli's) for some fabulous smoked meat sandwhiches while in Montreal?Rodent wrote:just getting back in from a two week Seattle -> Amsterdam -> Paris -> Montreal -> Detroit -> Wichita -> Seattle business trip ... where's my coffee?!!!
Rod
Re: Warwick Streamer Stage 1 headstock repair and clean up
Hi Guys,
You remember this little project of mine? Well, my ex has absconded with my Warwick bass and is trying to sell it. If anybody gets wind of this please let me know.
mvanderbyl@mac.com
Thanks,
Mark
Serial Number: A-034623 97
Year: 1997
You remember this little project of mine? Well, my ex has absconded with my Warwick bass and is trying to sell it. If anybody gets wind of this please let me know.
mvanderbyl@mac.com
Thanks,
Mark
Serial Number: A-034623 97
Year: 1997
Re: Warwick Streamer Stage 1 headstock repair and clean up
Maybe Andrew can give this a higher profile by creating a sticky at the top of Southpaw Spotted section?
And you have my condolences. Start calling the pawn shops .....
And you have my condolences. Start calling the pawn shops .....